How to Install PHP in nginx

Prerequisites

Install nginx web server

Step 1: Install PHP & PHP-FPM

Install packages php & php-fpm package on server using epel repository.

# yum --enablerepo=epel -y install php php-mbstring php-pear php-fpm

Step 2: Configure PHP-FPM

Modify user and group name in php-fpm configuration file.

# vi /etc/php-fpm.d/www.conf

user = nginx
group = nginx

Step 3: Start Service

Start php-fpm service.

# /etc/rc.d/init.d/php-fpm start

Starting php-fpm: [ OK ]
# chkconfig php-fpm on

Step 4: Configure default.conf file

Modify default.conf file.

# vi /etc/nginx/conf.d/default.conf
    # add follows in a "server" section

    location ~ \.php$ {
        fastcgi_pass   127.0.0.1:9000;
        fastcgi_index  index.php;
        fastcgi_param  SCRIPT_FILENAME  $document_root$fastcgi_script_name;
        include        /etc/nginx/fastcgi_params;
    }

Step 5: Restart Service

Restart nginx server to execute the latest configurations.

# /etc/rc.d/init.d/nginx restart

Stopping nginx: [ OK ]
Starting nginx: [ OK ]

Step 6: Create a PHP Page

Create a PHP test page and save the file.

# echo "" > /usr/share/nginx/html/info.php

Open Your favorite browser and hit the URL: http://Your-IP-Address/info.php
phpinfo

How to Configure Virtual Host in NGINX Web Server

Step 1: Prerequisite

Step 2: Add Domains in nginx Configuration File

To add multiple domains in nginx web server edit /usr/share/nginx/virtual.host file and create virtual hosts.

# vi /etc/nginx/conf.d/virtual.conf
# add at the last line

server {
    listen       80;
    server_name  www.a.com;

    location / {
        root   /usr/share/nginx/a.com;
        index  index.html index.htm;
    }
}

Step 3: Restart nginx server

# mkdir /usr/share/nginx/a.com
# /etc/rc.d/init.d/nginx restart

Stopping nginx: [ OK ]
Starting nginx: [ OK ]

Step 3: Create a Web page

# vi /usr/share/nginx/a.com/index.html

<html>
<body>
<div style="width: 100%; font-weight: bold; text-align: center;">
Nginx Test Page
</div>
</body>
</html>

How to Install SubVersion in Linux

Subversion is a free/open-source version control system.

Step 1: Prerequisites

Step 2: Install Subversion

Use following command to install subversion and mod_dav_svn packages.

# yum install mod_dav_svn subversion

Step 3: Configure Subversion with Apache

Create a file and edit the file with following changes:

# touch /etc/httpd/conf.d/subversion.conf
# vim /etc/httpd/conf.d/subversion.conf

LoadModule dav_svn_module     modules/mod_dav_svn.so
LoadModule authz_svn_module   modules/mod_authz_svn.so
<Location /svn>
   DAV svn
   SVNParentPath /var/www/svn
   AuthType Basic
   AuthName "Subversion User Authentication "
   AuthUserFile /etc/svn-auth-users
   Require valid-user
</Location>

Step 4: Create SVN User

# htpasswd -cm /etc/svn-users test_user

Step 5: Create SVN Repository

Use following command to create your fist svn repository.

# cd /var/www/svn
# svnadmin create testrepo
# chown -R apache.apache testrepo
# chcon -R -t httpd_sys_content_t /var/www/svn/testrepo/
# chcon -R -t httpd_sys_rw_content_t /var/www/svn/testrepo/

Step 6: Open Page on Browser

Test the SVN repository on your favorite browser

http://Your-IP/svn/testrepo/

Step 7: Configure svnserve.conf file

Edit the svnserve.conf file and make the following changes:

# vi /var/www/svn/testrepo/conf/svnserve.conf
anon-access = none authz-db = authz

Step 8: Create sample directories

Create sample subversion directories

# mkdir subversion_templates
# cd subversion-templates/
# mkdir packages
# mkdir patches
# mkdir downloads

Step 9: Import the Subversion repository

Import the Subversion repository.

# svn import -m 'Initial import' subversion-templates/ http://Your-IP-Address/svn/repo/
Adding         subversion-templates/packages
Adding         subversion-templates/patches
Adding         subversion-templates/downloads
Committed revision 2.

How to install Nginx on RHEL/CentOS

Step 1: Install Nginx

Nginx is well known web server. Download and install nginx repos:

For RedHat

# wget http://nginx.org/packages/rhel/6/noarch/RPMS/nginx-release-rhel-6-0.el6.ngx.noarch.rpm
# rpm -ivh nginx-release-rhel-6-0.el6.ngx.noarch.rpm

For CentOS

# wget http://nginx.org/packages/centos/6/noarch/RPMS/nginx-release-centos-6-0.el6.ngx.noarch.rpm
# rpm -ivh nginx-release-centos-6-0.el6.ngx.noarch.rpm
# yum --enablerepo=epel -y install nginx

Step 2: Configure Nginx

Edit the nginx.conf file to configure Nginx.

# vi /etc/nginx/nginx.conf
worker_processes 2
gzip on;
# cp /etc/nginx/conf.d/default.conf /etc/nginx/conf.d/default.conf.org
# egrep -v "^ *#|^ *$" /etc/nginx/conf.d/default.conf.org > /etc/nginx/conf.d/default.conf

Edit default.conf file and enter the server name

# vi /etc/nginx/conf.d/default.conf
server_name www.example-server

Step 3: Start nginx Server

After configuration has made, restart nginx service.

# service nginx start 
OR
#/etc/rc.d/init.d/nginx start
Starting nginx: [ OK ]
# chkconfig nginx on

Step 4: Open Page on Browser

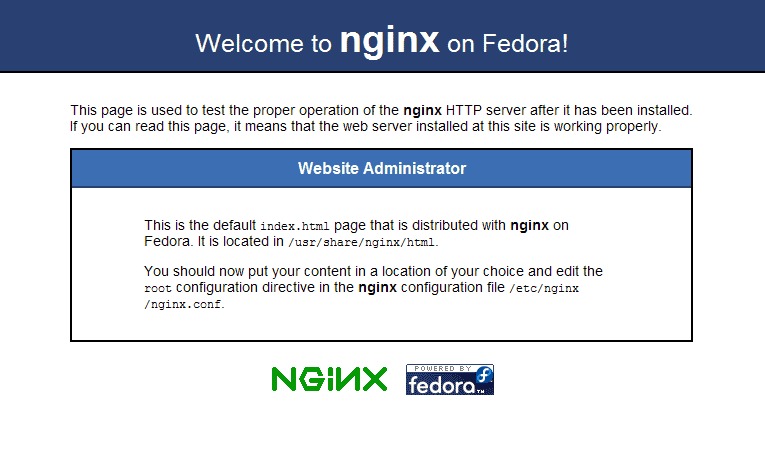
Hit the Server IP on your favorite browser, a default page of nginx appears:

nginx-homepage

How to Install PHP in Linux

Step 1: Prerequisite

Step 2: Install PHP

Run the yum install command

# yum install php-mysql php-devel php-gd php-pecl-memcache php-pspell php-snmp php-xmlrpc php-xml

Step 3: How to configure PHP

# vi /etc/php.ini
memory_limit = 128M
max_execution_time = 120
max_upload_size = 50M
post_max_size = 50M

Step 4: Create PHP page

Create the /var/www/html/phpinfo.php file with the following text:

# touch /var/www/html/phpinfo.php
# vi /var/www/html/phpinfo.php
<?php
phpinfo();
?>

Step 5: Restart Apache Server

Now restart Apache Server

# service httpd restart

Step 6: Open Page on Browser

Test the php page on your favorite browser:
http://Your-IP-address/phpinfo.php

How to Install WordPress in Linux

Step 1: Prerequisites

Step 2: Create WordPress Database

# mysql -u root -p
Enter password:
Welcome to the MySQL monitor.  Commands end with ; or \g.
Your MySQL connection id is 834
Server version: 5.6.24 MySQL Community Server (GPL)

Copyright (c) 2000, 2015, Oracle and/or its affiliates. All rights reserved.

Oracle is a registered trademark of Oracle Corporation and/or its
affiliates. Other names may be trademarks of their respective
owners.

Type 'help;' or '\h' for help. Type '\c' to clear the current input statement.

mysql> show databases;
+--------------------+
| Database           |
+--------------------+
| information_schema |
| mysql              |
| performance_schema |
+--------------------+
3 rows in set (0.02 sec)

mysql> create database wordpress;
Query OK, 1 row affected (0.01 sec)

mysql> grant all privileges on wordpress.* to wordpress@'localhost' identified by 'password';
Query OK, 0 rows affected (0.02 sec)

mysql> flush privileges;
Query OK, 0 rows affected (0.00 sec)

mysql> exit
Bye

Step 3: Install WordPress

To Install wordpress package use the yum command i.e.

# yum --enablerepo=epel -y install wordpress

Step 4: Configure WordPress

Edit the wp-config.php file to configure wordpress

# vi /etc/wordpress/wp-config.php

define('DB_NAME', 'wordpress');
define('DB_USER', 'wordpress');
define('DB_PASSWORD', 'password');
define('WPLANG', 'ja');
# vi /etc/httpd/conf.d/wordpress.conf
Allow from all
# mkdir /usr/share/wordpress/wp-content/languages
# wget -P /usr/share/wordpress/wp-content/languages \
http://svn.automattic.com/wordpress-i18n/ja/tags/`rpm -q wordpress | cut -d"-" -f2`/messages/ja.mo \
http://svn.automattic.com/wordpress-i18n/ja/tags/`rpm -q wordpress | cut -d"-" -f2`/messages/admin-ja.mo \
http://svn.automattic.com/wordpress-i18n/ja/tags/`rpm -q wordpress | cut -d"-" -f2`/messages/admin-network-ja.mo \
http://svn.automattic.com/wordpress-i18n/ja/tags/`rpm -q wordpress | cut -d"-" -f2`/messages/continents-cities-ja.mo

Step 5: Restart apache Server

Restart apache server:

# service httpd restart
OR
# /etc/rc.d/init.d/httpd restart
Stopping httpd: [ OK ]
Starting httpd: [ OK ]

How to Configure Multiple Domains in Web Server

Step 1: Prerequisite

Step 2: Add Domains in Apache Configuration File

To add multiple domains in web server edit /etc/http/conf/httpd.conf file and create virtual hosts.

# vi /etc/http/conf/httpd.conf
NameVirtualHost 10.0.0.10
<VirtualHost *:80>
    ServerAdmin webmaster@tecdistro.com
    DocumentRoot /var/www/html/tecdistro.com
    ServerName www.tecdistro.com
    ServerAlias tecdistro.com
    ErrorLog /var/log/tecdistro.com-error_log
    CustomLog /var/log/tecdistro.com-access_log common
</VirtualHost>
<VirtualHost *:80>
    ServerAdmin webmaster@tecdistro.org
    DocumentRoot /var/www/html/tecdistro.org
    ServerName www.tecdistro.org
    ServerAlias tecdistro.org
    ErrorLog /var/log/tecdistro.org-error_log
    CustomLog /var/log/tecdistro.org-access_log common
</VirtualHost>
<VirtualHost *:80>
    ServerAdmin webmaster@tecdistro.net
    DocumentRoot /var/www/html/tecdistro.net
    ServerName www.tecdistro.net
    ServerAlias tecdistro.net
    ErrorLog /var/log/tecdistro.net-error_log
    CustomLog /var/log/tecdistro.net-access_log common
</VirtualHost>

Step 3: Restart Apache Server

After the changes have made, Restart the apache server:

# service httpd restart
OR
# /etc/rc.d/init.d/httpd restart

How to Configure Website Using Htaccess with Apache in Linux

Step 1: Prerequisite

Step 2: Create Directory

Create a directory in /var/www/html/ (where DocumentRoot of apache is pointed).

# mkdir /var/www/html/testfolder
# cd /var/www/html/testfolder

Step 3: Create .htaccess File

Now create a .htaccess file using the touch command and insert the following lines in it:

# touch .htaccess
# vi .htaccess
AuthUserFile /var/www/html/testfolder/.htpasswd
AuthGroupFile /www.null
AuthName "Authorization Required"
AuthType Basic

require user USER_NAME

Set the password by executing the htpasswd command for htaccess

# htpasswd -c /var/www/html/testfolder/.htpasswd USER_NAME

Step 4: Configuration in Apache

Edit the /etc/httpd/conf/httpd.conf file and add the lines:

# vi /etc/httpd/conf/httpd.conf
<Directory "/var/www/html/testfolder">
AllowOverride AuthConfig
</Directory>

Step 5: Restart Apache Server

In the end restart the httpd service:

# service httpd restart

HTTP Status Code